At the outset, let me tell you that I bake these cookies once a year. Growing up, I ate them once a year relishing the leftovers over a few days time, which indicates that my mom also made them only once a year. Traditionally, Roth is a fried bread. But my mom used to make a stovetop baked version as well called the hokh roth ( dry roth) . This Roth recipe is based on the dried version.
The Kashmiri Roth makes me think of home, reminds me of my mom, brings memories of childhood helping mom make the Roth. These are cookies I save in the freezer to eat on a day when everything appears to go wrong. These are cookies I make and eat with a reverence and these are cookies that bring me a deep sense of stability no matter what’s going on in life.

For a Kashmiri Pandit, Roth are not just cookies. These are a part of who we are and making these cookies is a very ancient tradition going back thousands of years. The ritual of making these cookies is called “Punn Duen” and after making them they are first offered to the Goddess of Harvest and hence sacred. The pots, pans and utensils used in baking these cookies are traditionally kept separate from everyday cooking utensils. They are only used once a year in every family for making these cookies and then packed away.
Every year, just around the fall season, there are a few auspicious days as per the lunar calender on which we must make the Roth. Each family picks a day as per their convenience and sets for “Punn Duen”. Freshly ground flour is bought, along with sugar and other materials and kept separate from everyday use things. The kitchen is given a deep clean the night before and the utensils for making Roth are brought out, scrubbed clean and a thread is spun out of cotton by a girl child. This thread is called the Punn and is a significant part of the ritual. The making of the Roth usually began at 4 a.m.

As a young girl, I used to pledge to wake up at 4 am along with my mother to make Roth. My grandmother and my mom somehow always managed to get through half of the process of making the Roth before I woke up, which was never at 4 a.m. To appease me, my mom would tell me to take a sanctifying bath, wear clean clothes and come and help her bake because she needed my help. Then she would ask me to hold the poppy seeds in my tiny fingers and spread it on the cookies that she rolled out. I used to feel so important and grown up, that I would even try and chant the hymns that the elders sang.
After the Roth is ready, which during my childhood days used to take a good few hours as my mom baked them one by one on a flat clay griddle on a wood fired stove; the prepared Roth are kept in a large wicker basket and covered with a muslin cloth. The lady of the house performs the Pooja and ties sacred thread around on the wrists of family members. Then she narrates a very old story mentioning why the festival of Pann Duen is held in such reverence. After everyone has offered their prayers, the Roth which is now considered a prasad, since it has the Goddess’s blessings, is offered to everyone.
When I moved away from home, my mom would send me the prasad every year and I would longingly wait for the package to arrive. After I moved from India, it became difficult for my mom to send these over. So I asked her to teach me how to make them. Since she was never a person for following recipes, she simply gave me her best guessed measures and guess what! They worked for me.
But for you all I have a tried tested and measured out recipe for this ancient cookie. I also made a few changes to the original to make it better suited for oven baking. You may substitute Ghee with butter or take a few moments to make ghee if you don’t have any.
My comfort cookies come with a lot of history and a lot of longing! How about yours?

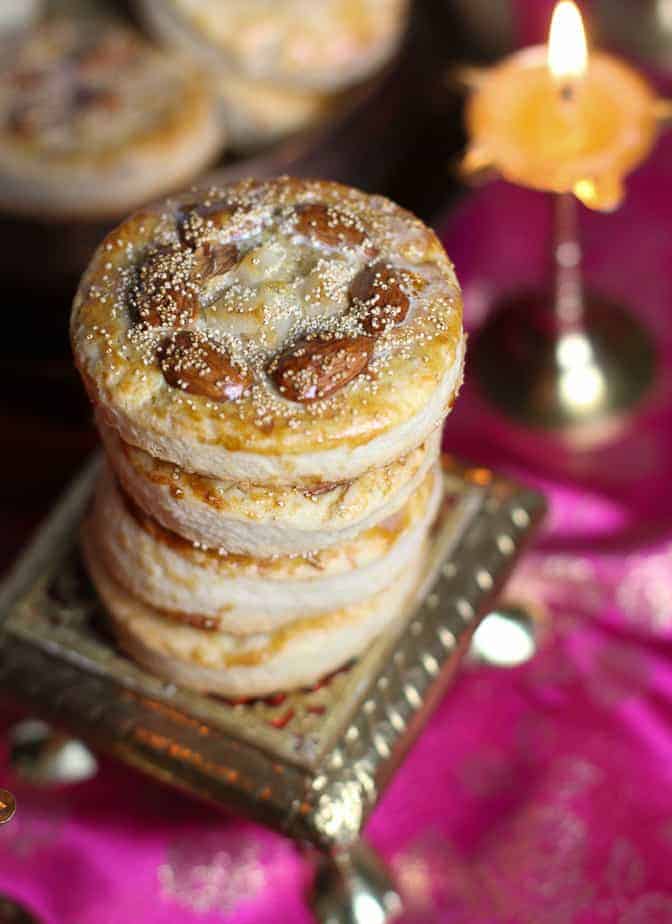
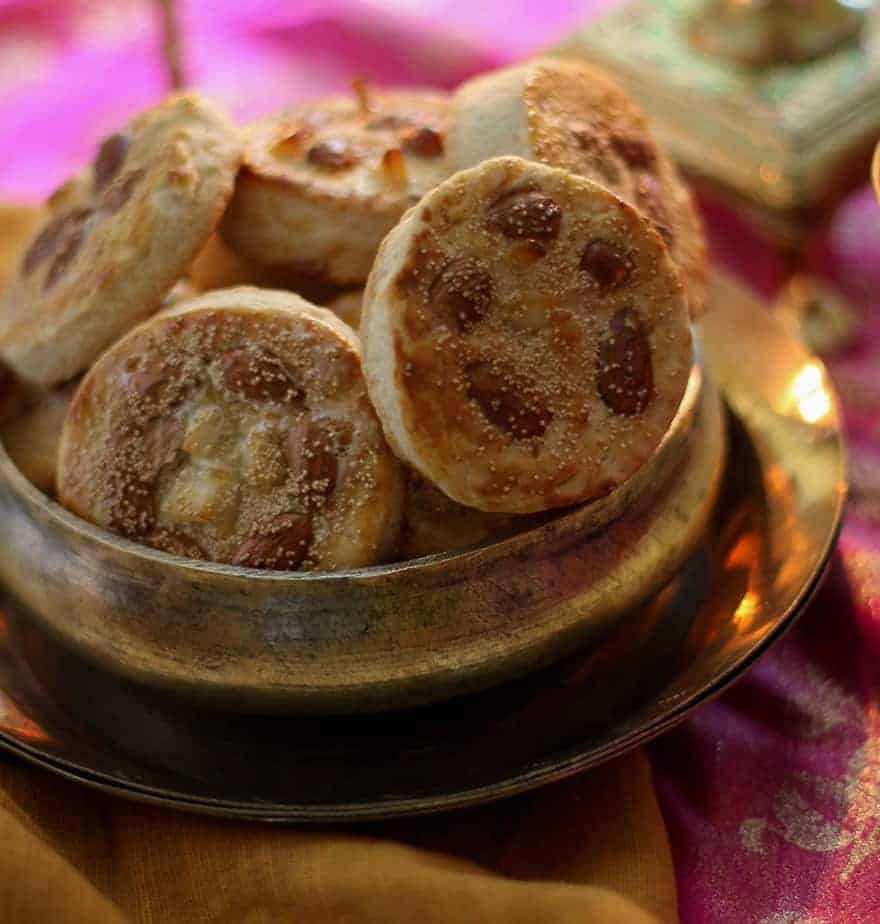
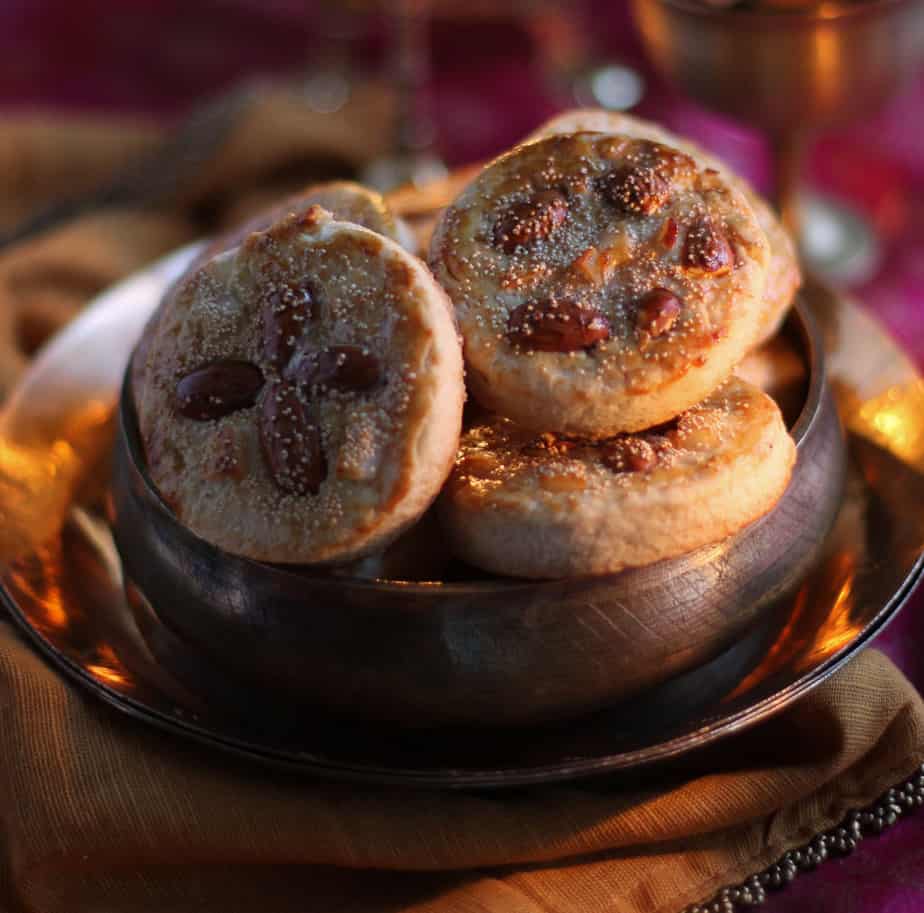
Roth -The Sacred Cookies from Kashmir
Ingredients
- 4 cups All purpose flour
- 2 tbs chilled butter cut into small pieces
- 6 tbs Ghee
- 1/4 tsp brown cardamom powder use only the seeds from one brown cardamom
- 1 1/4 cups sugar
- 1 cup water
- 1 cup almond halves
- 1/4 cup chopped fresh coconut slices
- 4 tbs milk powder mixed in 4 tbs water
- 3 Tbs Poppy seeds
Instructions
In a bowl, add the flour, butter, ghee and cardamom and mix it all in until the flour sort of looks like coarse corneal.( when you gather some of it in your palm it should appear to be holding together )

- Add in the sugar and mix.
- Add water gradually and mix until the dough comes together. Do not over knead. You may not need all the water, so begin with half a cup and then a tbs at a time, until the dough comes together.
- Let it rest covered for about 10 minutes.
- Heat the oven to 375*F
Roll out the dough to about 3/8th inch thickness (No need to be precise but somewhere between 1/4 and 1/2 of an inch is good)
- Cut out the cookies in desired shapes. Mine was a 6 inch round cutter.

- Place on a baking sheet lined with parchment.
- Roll out the leftover dough again and repeat the process of cutting and rolling until all the dough is used up.
Take a sharp paring knife and pierce the shaped cookie rounds a few times. This ensures they don't puff up while baking
- Press in the almond and coconut slices, brush with a little milk powder paste and sprinkle some poppy seeds on top.
- Bake for 25 – 30 minutes until light brown on top.
- Cool on a wire rack

The theme this month is Comfort Food Cookies! What cookie says comfort food to you? If you are a blogger and want to join in the fun, contact Laura at thespicedlife AT gmail DOT com and she will get you added to our Facebook group, where we discuss our cookies and share links.
You can also just use us as a great resource for cookie recipes–be sure to check out our Pinterest Board and our monthly posts (you can find all of them here at The Spiced Life). You will be able to find them the first Tuesday after the 15th of each month! Also, if you are looking for inspiration to get in the kitchen and start baking, check out what all of the hosting bloggers have made:
- Butterscotch Cookies from A Baker’s House
- Chocolate Cappuccino Toffee Chip Cookies from Karen’s Kitchen Stories
- Chocolate Chip Cookies Made with an Assortment of Chocolate from The Spiced Life
- Quadruple Chocolate Shortbread Cookies from Magnolia Days
- Dark Chocolate Chunk Chocolate Peanut Butter Cookies from Food Lust People Love
- Roth (The Sacred Cookies from Kashmir) from Spiceroots
- Crispy Potato Chip Cookies from Rhubarb and Honey
- Carrot Cake Sandwich Cookies from Made with Love
- Triple Chocolate Cookies from It’s Yummi
- Peanut Butter Chocolate Chunk Cookies from Noshing with the Nolands
- Thekua (Sweet Wheat Cookies from Bihar) from Indian Curries/Stew
- Momma’s Bran Chocolate Chip Cookies from Sweet Cinnamon Honey
- Nut Cookies from Basic N Delicious
- Banana Oatmeal Chocolate Chip Cookies from What Smells So Good?