
Someday, I hope, I will have the right words to describe how I feel when I bake bread. Especially a bread which resembles bread from back home in Kashmir. Bread that I have a very old relationship with. And to think that one day I would be baking my own was not something I could have known when I was a little girl, in that Kandir waan. { Story Here}
Last summer I went home to visit my Dad and my siblings and my daughter insisted on eating the freshly made breads from the local bake shop. Though the culture of having a few bake shops just down the street is no longer prevalent but there still are a few good bakers who love their craft and there still are people who love the bread artfully baked in clay ovens. And thankfully one of the greatest bake shop in town is where my Dad lives.
My daughter and I were treated to freshly baked Kashmiri breads every day while we were visiting.
I also got to be an apprentice at the bakery and learn to make a few of those fabled breads. That was the highlight of my trip in India, Until I being the novice that I was, managed to burn my arm on the tandoor and the apprenticeship came to an end. But I did learn a lot – fire safety was one of the things I learned, I think.
As any expat will tell you, as much as we love exploring the new home country, the emotional roots from the country we were born in stay intact. The memories of growing up, the sights and smells of food, the way of life – everything is etched deep and forever. It was for this reason my love and adoration began as soon as I landed here. For bagel looked exactly like the evening bread “telvor” from my home. Upon eating my first bagel, I did realize that it didn’t taste nearly the same, I loved it anyway. Then as if on cue, I remembered this American couple who I had met back in kashmir, when I was a young girl. It was a school picnic to one of the many tourist destinations in the valley and we chanced upon the couple eating the “telvor” for their lunch. We found it interesting that out of the many dishes to pack for a picnic, they would eat a humble bread with butter. I forgot about it until that moment when I had my first bagel. In that moment I finally understood, they were perhaps feeling a bit closer to home with that bite of bread.

I hope to someday be able to create a home version of the “telvor” but for now I am happy to share the New York Style Bagels with you all. It’s not the same as “telvor” and that is a good thing.
I haven’t ever had a New York style bagel, so I didn’t have much to go on with in terms of experience of taste and texture, so I simply followed the instructions of none other than Peter Reinhart and soaked up every single word he says about bagels. The result was a spectacular display of bagels on my kitchen counter and a feeling on immense joy.
For this batch, I did everything by the book, ordered the high gluten flour and diastatic malt powder from King Arthur, waited impatiently for their arrival, and set to work as soon as they landed on my doorstep. Yes, this was one bread I was very keen to bake, eat and experience. I also made the sponge and then went ahead with the bagel making process. And I am glad I did. The pre fermentation was instrumental in the bagels being equally good the next day.
The dough needs quite a bit of kneading, so be prepared to use a lot of muscle power. My 6Qt KitchenAid stand mixer started to lose steam at about 3 minutes. So I just kneaded it by hand, working in the flour a bit at a time until it reached the window pane stage. After that it was shaping and rising time.
It is also suggested that shaping the bagels into a rope shape and then forming a circle and rolling the ends onto each other to seal, makes the bagels retain their shape better and they rise better as compared to the ones where you stretch them out and make a hole in the center.


New York Style Bagels
Ingredients
For the sponge
- 1 teaspoon instant yeast
- 4 cups unbleached high-gluten flour
- 2½ cups tepid water
For the dough
- ½ teaspoon instant yeast
- 3¾ cups unbleached high-gluten flour
- 1.5 teaspoons salt I reduced salt because of personal preference
- 2 teaspoons malt powder
For Water boiling
- 1 tablespoon baking soda
- Wide pan filled half way with water
For Topping
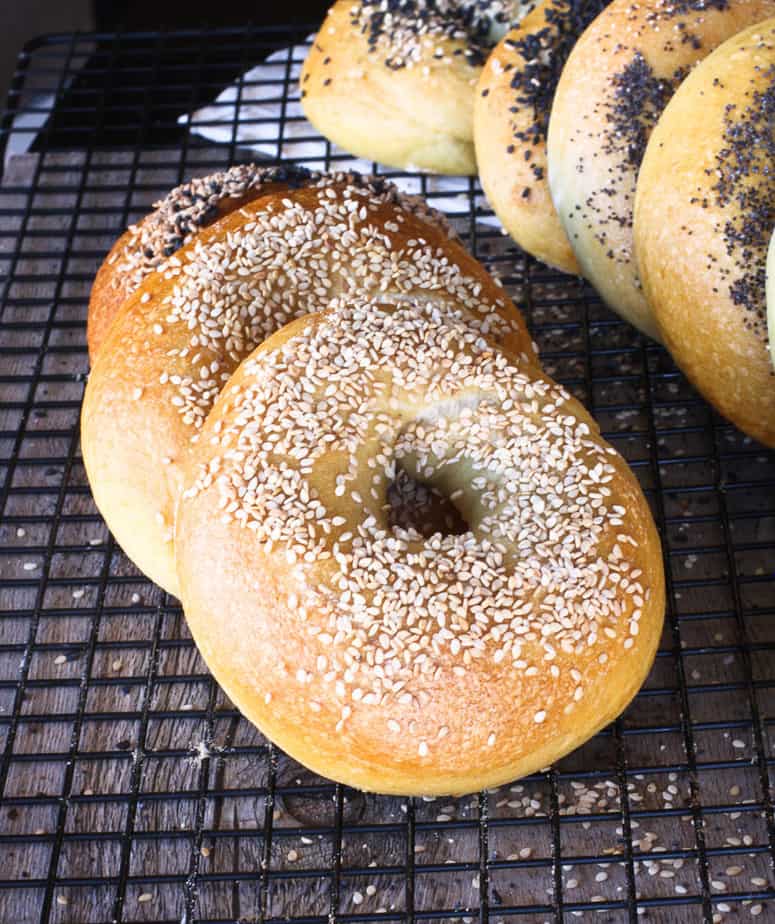
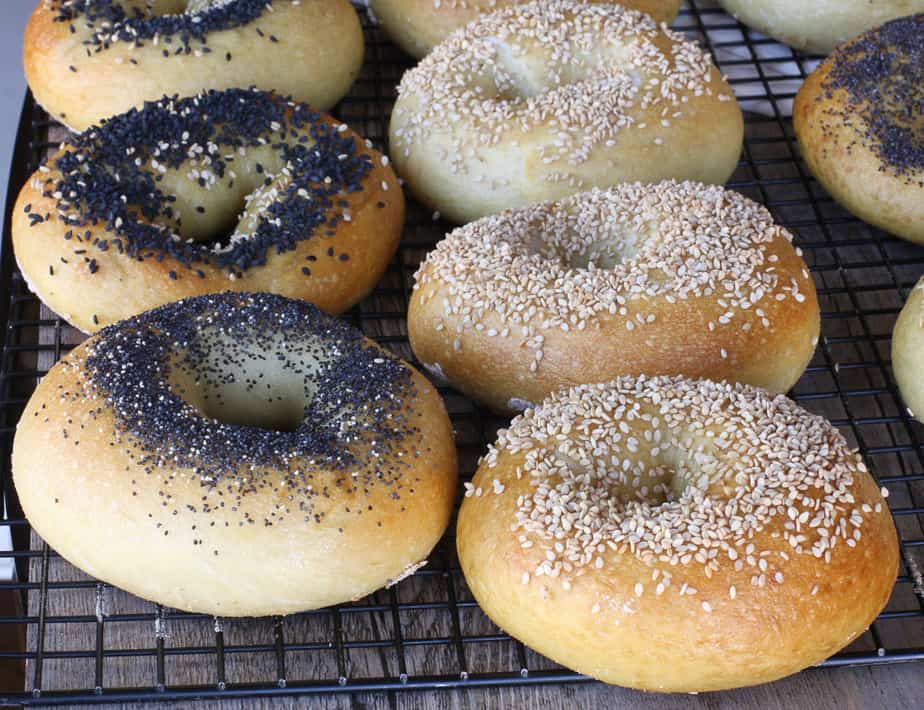
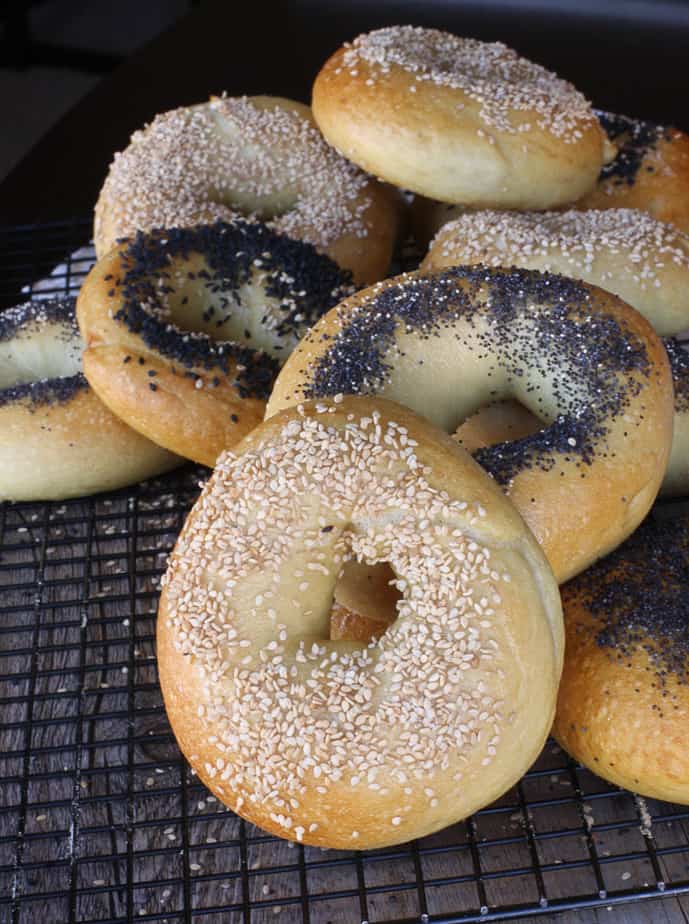
- Black and white Sesame seeds poppy seeds for adding on top
Instructions
Make the sponge
- Take a mixing bowl and Mix the yeast into the flour. Add the water, mix until smooth and all flour is hydrated.
- Cover the bowl with plastic wrap and leave at room temperature for 2 - 3 hours, or until the mixture becomes very foamy and bubbly. It took my sponge about 4 hours to double in size because it was a particularly cold day. But that is what you are looking for - double the size.
Make the dough
- After the sponge has doubled, add the additional yeast to the sponge and stir. Then add 3 cups of the flour and all of the salt and malt. Mix until the ingredients come together and then add the remaining flour a little at a time to make a very stiff dough.
- Knead this dough until pliable and the dough passes the window pane test. It helped to take the temperature with an instant read thermometer. The dough temp should read between 77 to 81 *F. Mine was ready when it registered an 81.
- Once the dough is ready, divide into 12 equal parts. I went and baked a baker's dozen just because!
- Cover the dough balls and allow them to rest for about 20 minutes.
- While the dough is resting prepare two sheet pans lined with parchment. Spray some oil on top of the sheets. Keep aside .
- Take one dough ball and roll it into an 8-inch long rope. Then wrap the dough rope around the palm and back of your hand, overlapping the ends by several inches. Press the overlapping ends on the counter with the palm of your hand, rocking back and forth to seal. Or Watch this video
- Place each of the shaped bagels on the pans making sure to leave space between them. Mist the bagels very lightly with an oil spray and cover loosely with plastic wrap. Let the pans sit at room temperature for about 20 minutes.
- After the 20 minutes, do a float test to see if the bagels are ready for a rise in the refrigerator.
Float test
- Fill a small bowl with cool water. Take one bagel and drop it into the bowl of water. If it floats within 10 seconds, your bagels are ready to be kept in the fridge. Return the tester bagel to the sheet pan, pat it dry, cover the pan once more and place it in the refrigerator overnight. If the test bagel doesn't float, return the bagel to the pan, pat it dry and cover and allow to sit at room temperature for another 20 minutes. Repeat the test until your test bagel floats immediately.
Baking day
- Preheat the oven to 500°F. Bring a large wide pot of water to a boil and add the baking soda.
- Gently drop the bagels into the water, boiling only as many as comfortably fit. My pot accommodated about 3 at a time. Boil for a minute on each side. Then remove with a slotted spoon and place them back on the sheet pan after adding the toppings. (Add toppings as soon as you remove the bagel from the boiling water)
- Bake for approximately 5 minutes, then rotate the pans a 180*. After the rotation, lower the oven setting to 450°F and continue baking for about 5 minutes, or until the bagels turn light golden brown.
- Allow to cool before eating.
Recipe Notes
Recipe from "The Bread Baker’s Apprentice" posted in "The Plate"