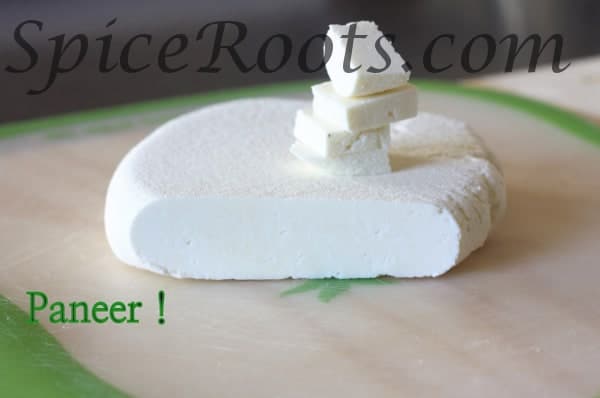
Making paneer at home is a bit of a process. But it is worth all the time you will need to put in. The resulting paneer is a soft and creamy deliciousness. Be warned though, you might end up eating this deliciousness before you get to making a dish out of it.
I don’t have memories of making paneer at home. No one in my family did it – Ever. It was simply bought from the local cheese shop along with milk and yogurt. If one needed more than a couple of pounds of paneer, the cheese maker had to be notified in advance. A good cheese maker never sent his regular customers back without cheese, so he wouldn’t sell more than a couple of pounds per customer. And you also had to be prompt. A good paneer never lasted – if you were late, there would be no paneer left to buy.
Making paneer at home, initially, did not yield good results. It sure was better than the frozen ice blocks that stores sold, but the dreamy – creamy melt in the mouth paneer was elusive. Then I saw this post from my favorite chef, Ajoy and I just had to try making paneer this way. It WORKED! It was the best paneer I had ever made. But because quality of whole milk varies, I had to make adjustments based on the kind of milk we get here. After a few trials I made a delicious, creamy, rich, smooth paneer – at home. Just like the one Grandpa used to buy from the cheese makers back home. Here is how to make paneer at home:-
How to make Paneer at Home
Ingredients
- 4 cups whole milk
- 1 C heavy whipping cream
- 3-4 tbs lemon juice
Spl Equipment
- cheesecloth
Instructions
- Mix the milk and cream and pour into a non stick pan.
- Heat it up and bring to a boil stirring intermittently so the milk does not stick.
- once the milk starts to boil, lower heat and start adding the lemon juice, a tsp at a time. As soon as you see the milk curdle and curds form, stop adding the lemon juice and turn off the heat.
- When the curds have separated from the whey, the whey looks a transparent light green color. It should not look white any more.
- Place a colander across the sink and spread a cheese cloth across it. Pour the curds along with the whey into this colander and let it drain.
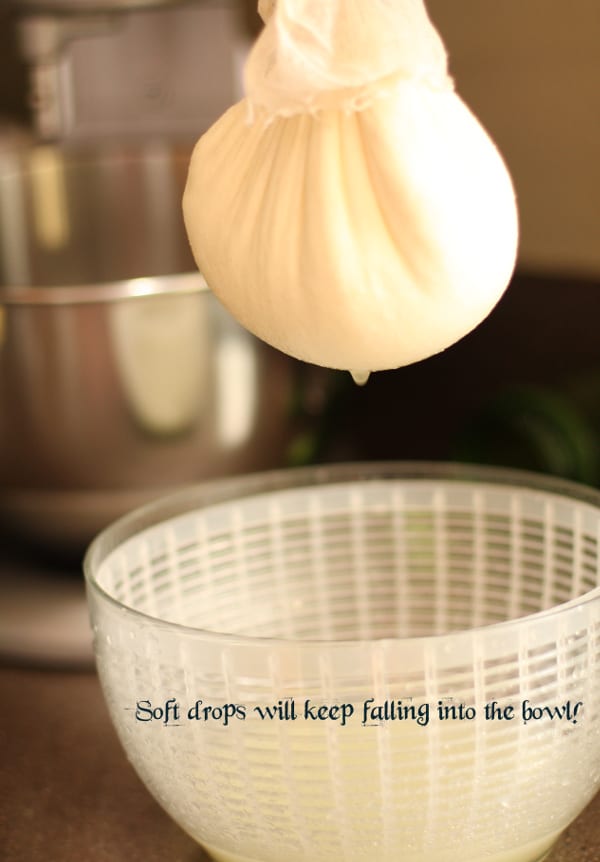
- Gather the cheesecloth, making a packet of the curds in the center and tie the ends just above the curds.
- Rinse the whole packet under tap water. This step ensures that you erase any traces of lemon flavor from the paneer. Now give it a tight squeeze to coagulate all the curds.
- I usually place the end of the packet in a kitchen cabinet ( to give it height) and weigh it down with my small mortar and place an empty bowl to gather any last drops of whey.
- In about 5 minutes the whey will stop dripping.
- Place the packet on a flat plate and then cover it with another flat plate and then cover the plate with something heavy - like the mortar or a pot filled with water and leave it to form a disc.
- In about 30 minutes, your paneer is ready to be used in dishes.